CSharPi: Getting Started
What if I said it was possible to run a Discord bot on a Raspberry Pi natively? With .NET, we can do just that.
Getting Started
Updated for .NET version 6.0!
Let’s get some prerequisites out of the way. The first thing we’ll do is install the .NET SDK on our local machine, as well as our Raspberry Pi. Next, we’ll ensure Git is installed both places as well.
Finally, I will be using Visual Studio Code for this project, so I will go over installing that as well.
If you are familiar with all of these concepts, and have created Discord bots before, feel free to skip to the next part of the series:

Otherwise, carry on!
Installing .NET
Local Machine
Let’s start out by installing the .NET SDK on our local machine. You’ll want to start here, and follow specific instructions for your OS: https://dotnet.microsoft.com/download.
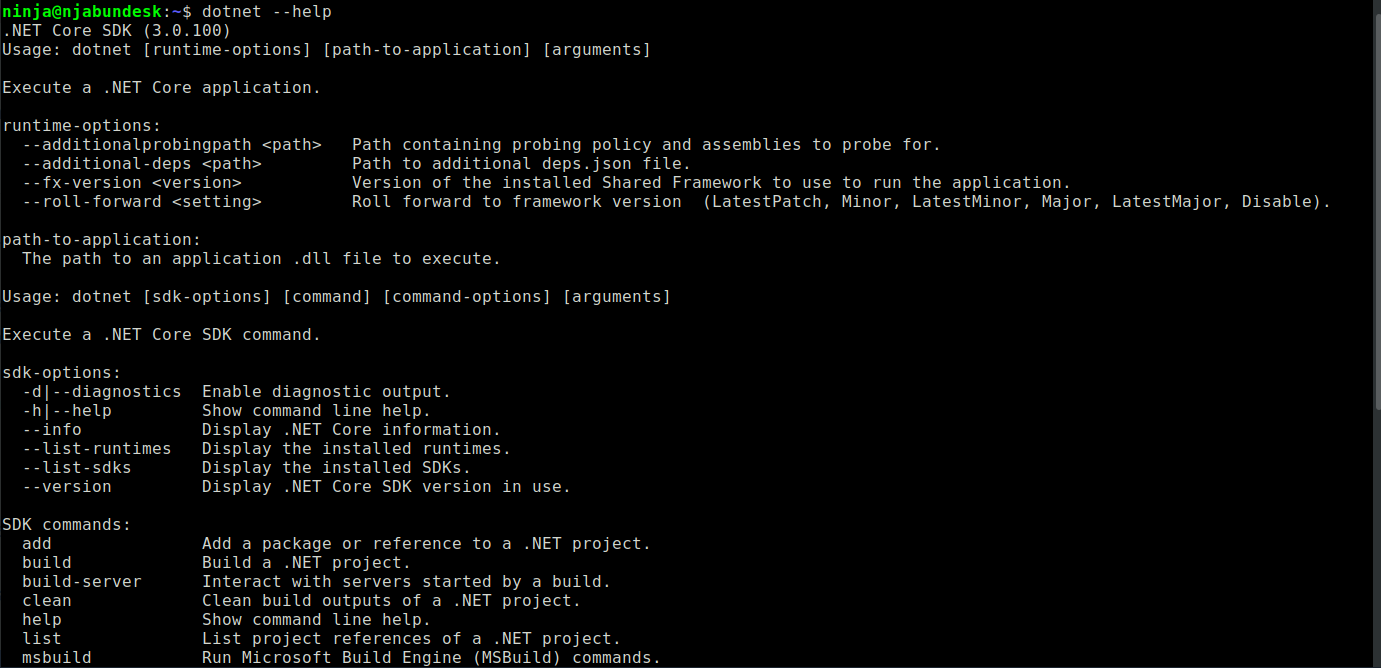
Once installed, you can verify it is working by dropping to the command line (OSX you’ll use Terminal, Windows you want PowerShell, and Linux whatever your favorite shell is), and running: dotnet --help
You should see something like this:
Raspberry Pi
The one prerequisite here is that you can SSH into your Raspberry Pi. If you need some help enabling SSH, check out this article here: https://www.raspberrypi.org/documentation/remote-access/ssh/.
If you’d like to setup your Raspberry Pi headless, and ensure it connects to your WiFi network and automatically enables SSH on first boot, check out my post:

Once you’re sshed in (Windows users that need help check this out: https://learn.adafruit.com/adafruits-raspberry-pi-lesson-6-using-ssh/ssh-under-windows), you can start installing .NET on your Pi.
The following commands will:
1. Navigate to the home directory
2. Download the .NET SDK
3. Create the directory /usr/share/dotnet
4. Uncompress the archive we downloaded into /usr/share/dotnet
5. Create a symbolic link so we can use the dotnet command
cd ~
wget https://download.visualstudio.microsoft.com/download/pr/72888385-910d-4ef3-bae2-c08c28e42af0/59be90572fdcc10766f1baf5ac39529a/dotnet-sdk-6.0.101-linux-arm.tar.gz
sudo mkdir /usr/share/dotnet
sudo tar -zxf dotnet-sdk-6.0.101-linux-arm.tar.gz -C /usr/share/dotnet
sudo ln -s /usr/share/dotnet/dotnet /usr/local/bin/dotnet
If all goes well, we should be able to run: dotnet --version.

Installing Git
Local Machine
Check out this URL for help installing Git on your local machine: https://git-scm.com/book/en/v2/Getting-Started-Installing-Git.
We can verify it works after installing by dropping to your favorite shell and running: git.

Raspberry Pi
If you are using the minimal (lite) version of Raspbian, or need Git installed otherwise, run: sudo apt install git, and accept any prompts with “y”.

Now we can run: git to verify it installed correctly.

Visual Studio Code
Visual Studio Code has become my editor of choice, even for some C# projects. We will install the client onto our local machine so we can edit the code there. For help installing Visual Studio Code, go here: https://code.visualstudio.com.
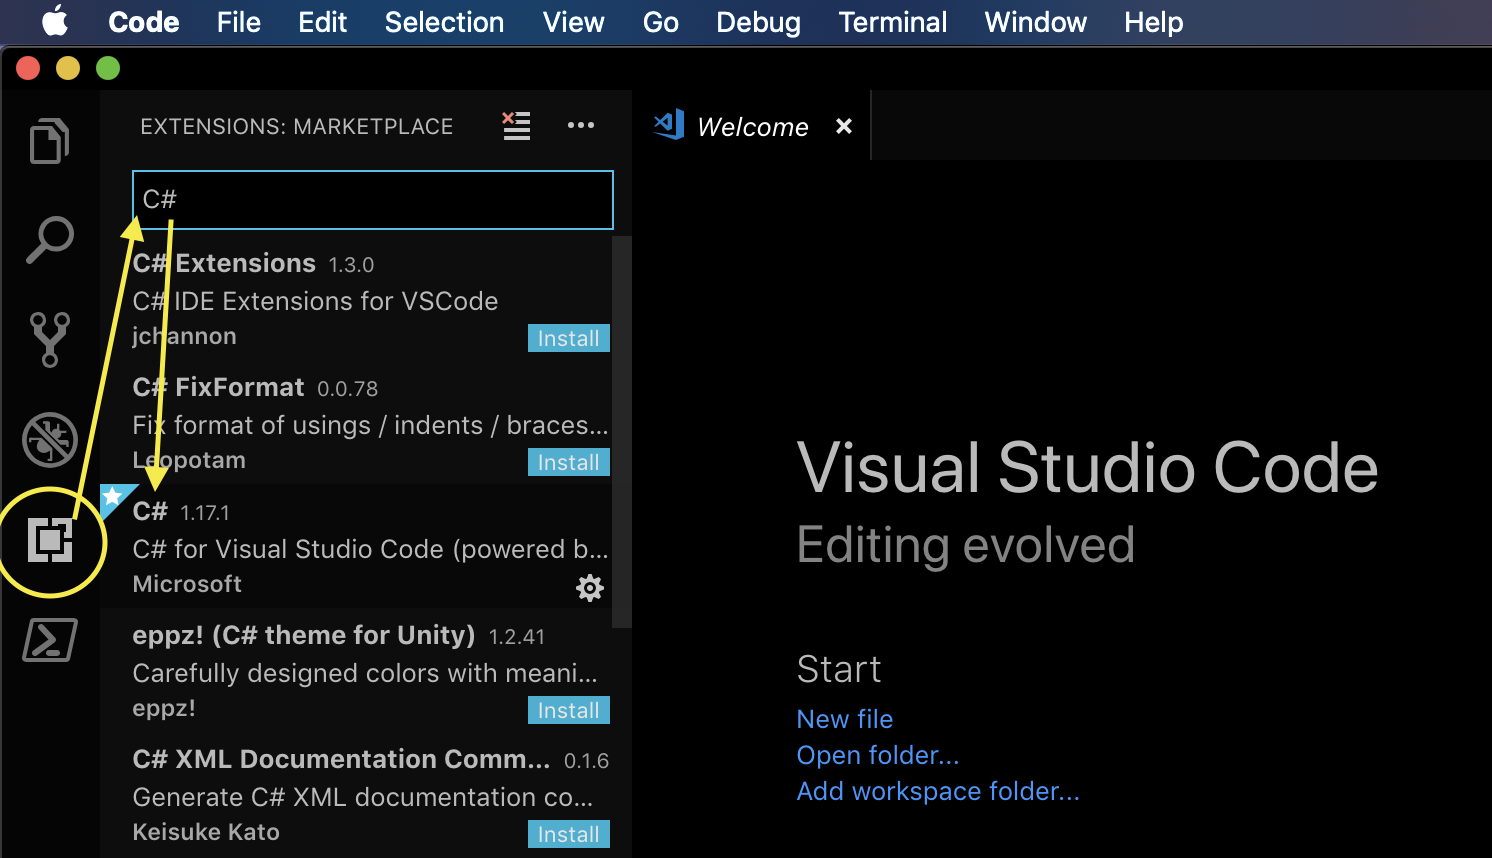
Once you have Visual Studio Code installed, open it up and click the extensions icon on the left (looks like a square). Then search for and install the C# extension. In this screenshot, it is the only one in the list for me that does not have an install option, and has a gear next to it (since I already have it installed). Once you install it, it will give you the option to reload Visual Studio Code.
Creating the .NET Project
Now we will be creating the .NET project. The machine we will be doing this on is our local machine, not the Pi.
Hello World
Let’s start by creating a dotnet console application.
1. Fire up your favorite shell, and run: dotnet new console -n csharpi.
This will create a new directory named csharpi, and create the project there.

2. Now open up the csharpi folder with Visual Studio Code. You will see a prompt in the lower right-hand corner asking if you want to add required assets, click “Yes”.

If all went well, you will now see a .vscode folder in the list.

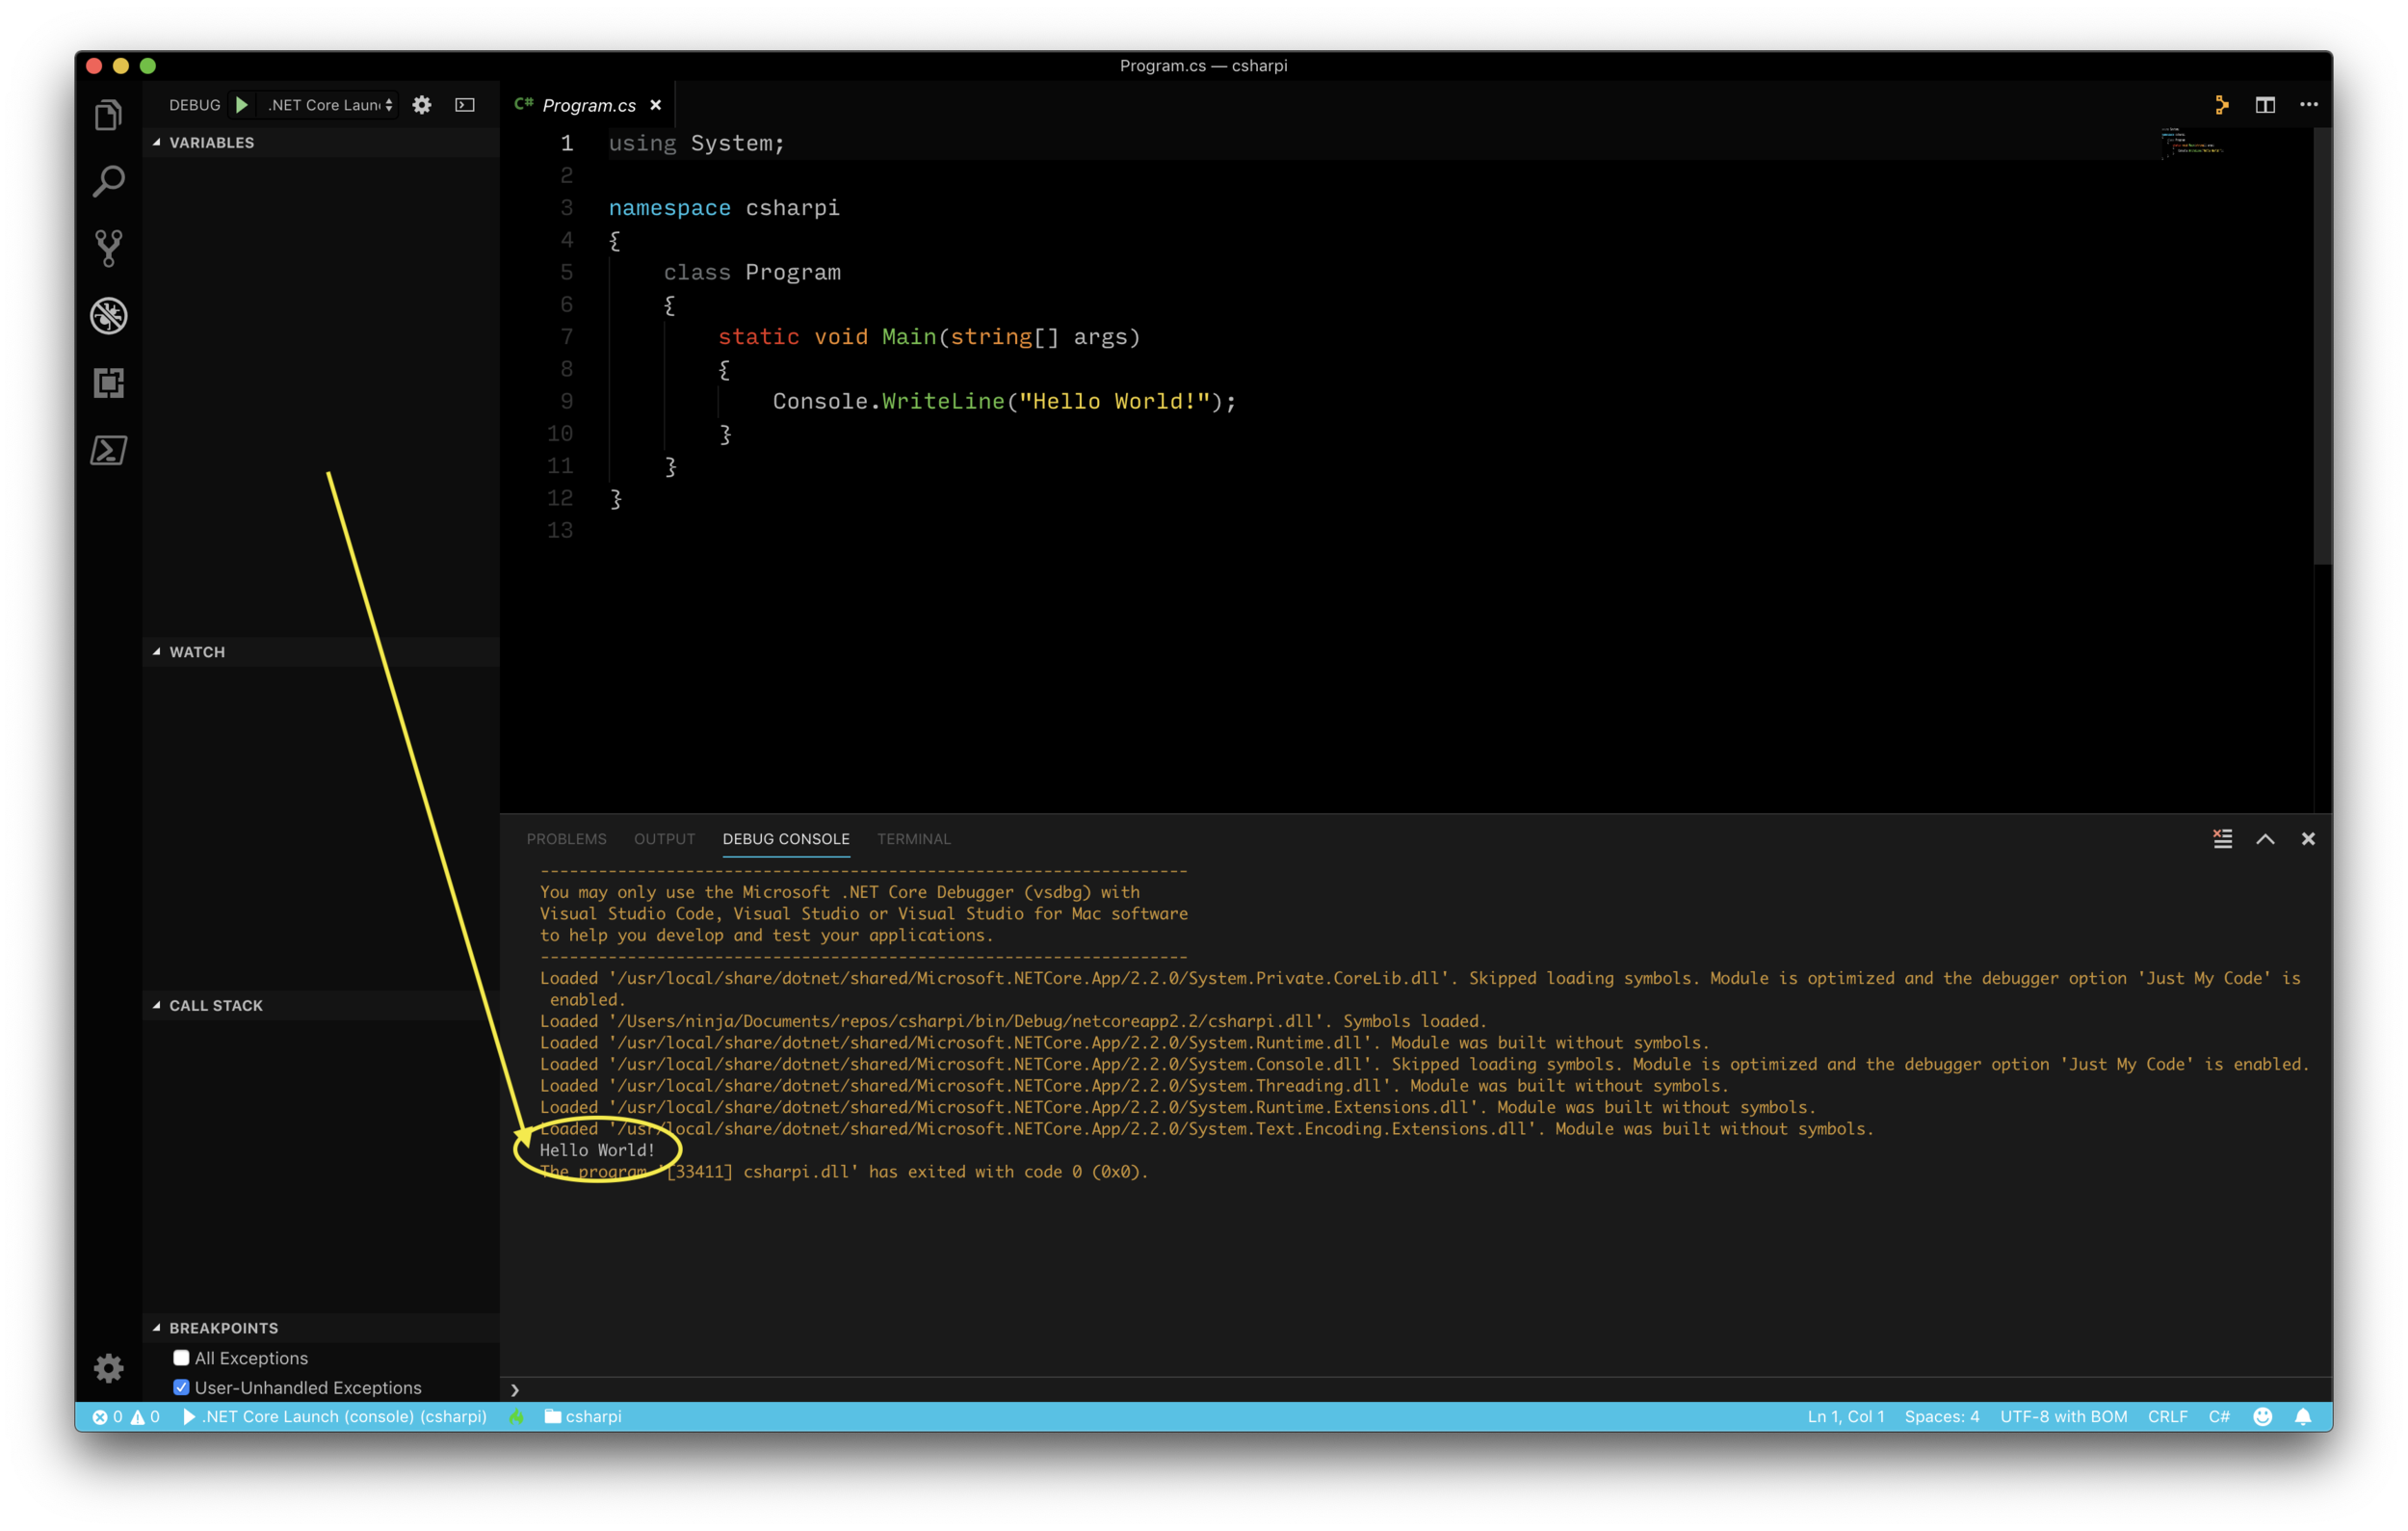
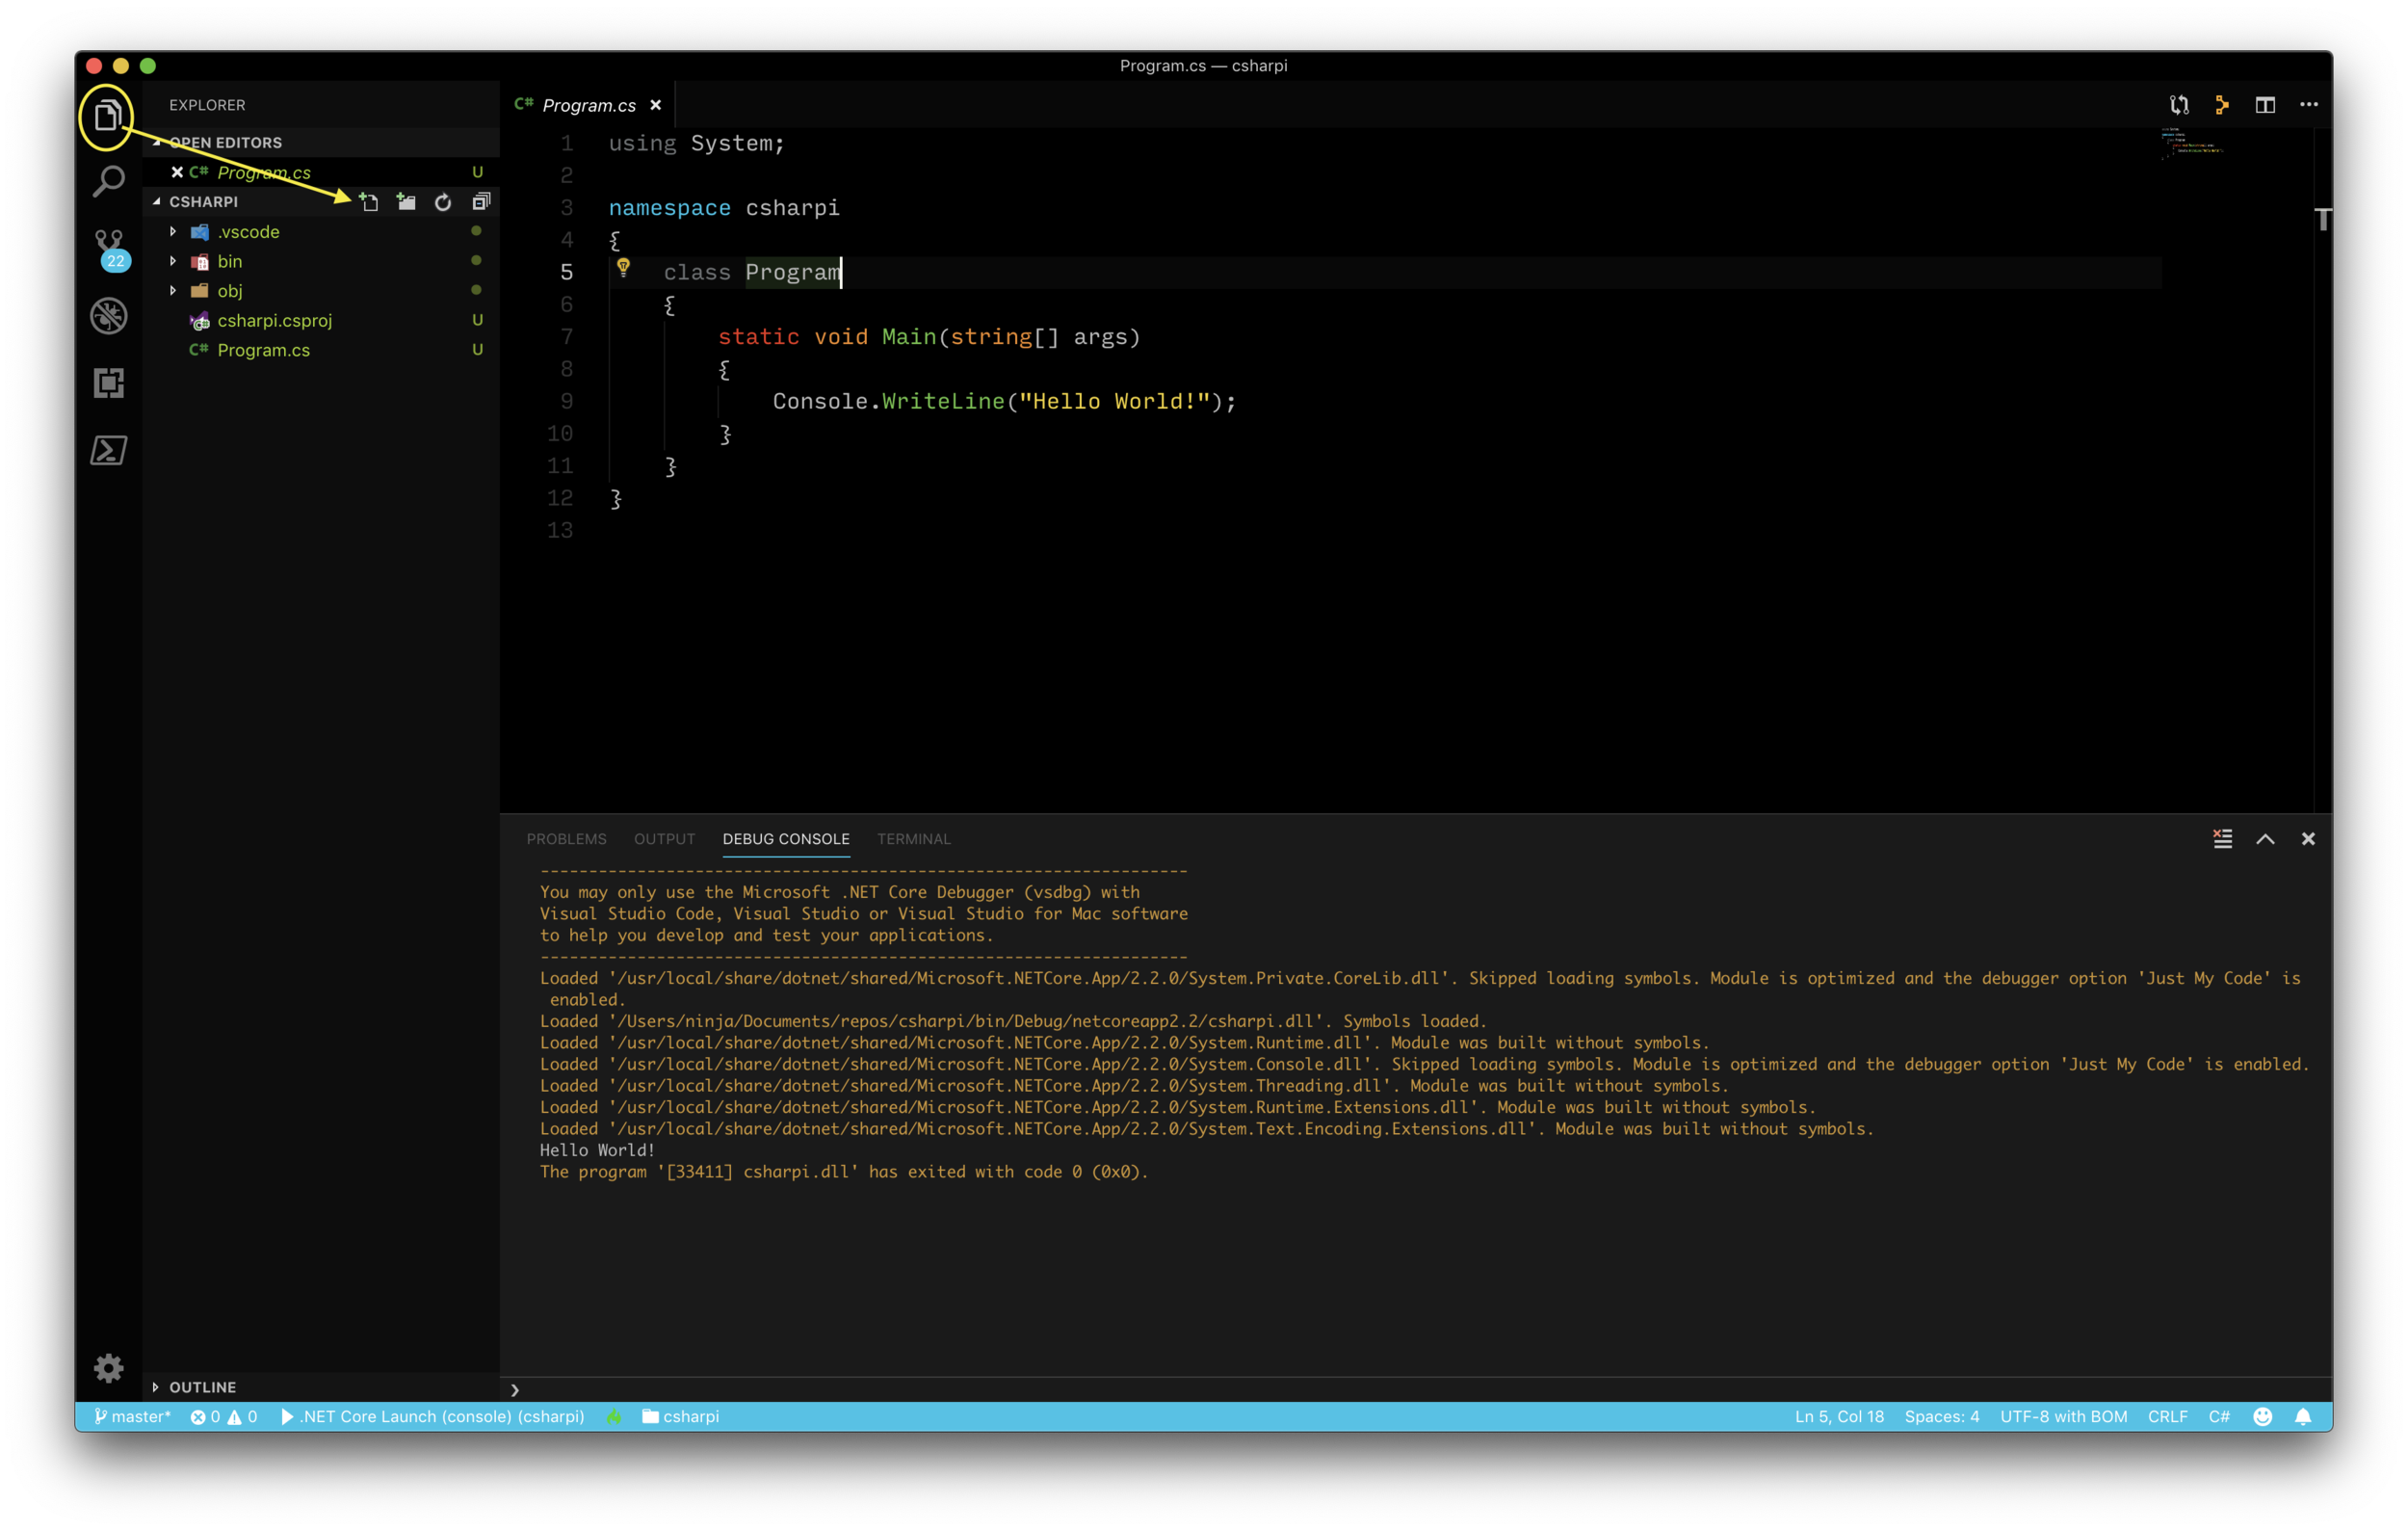
3. Now to test things out. Click Program.cs to see the example code the default project provides that will write out “Hello World” to the console. Go to the Debug menu, and click “Start Debugging” (or simply hit F5).
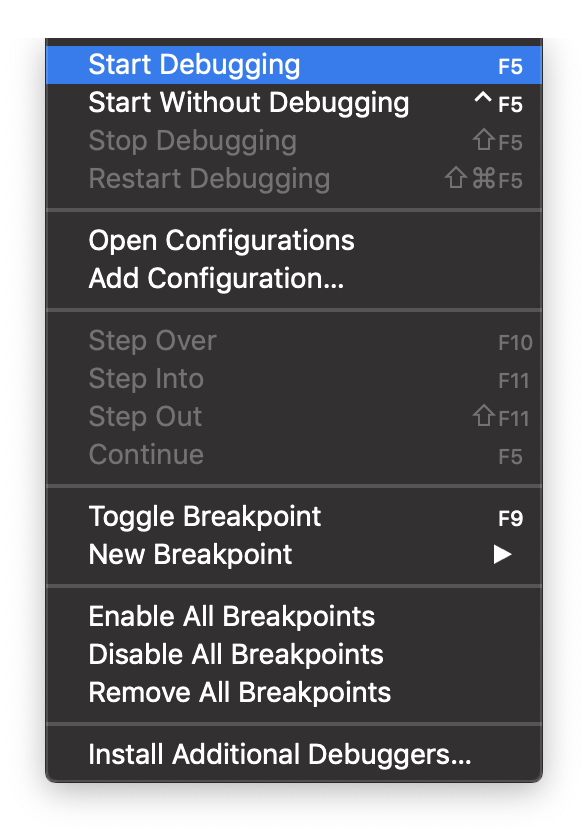

If you see “Hello World”, our project has been created, and we have the ability to edit it in Visual Studio Code.
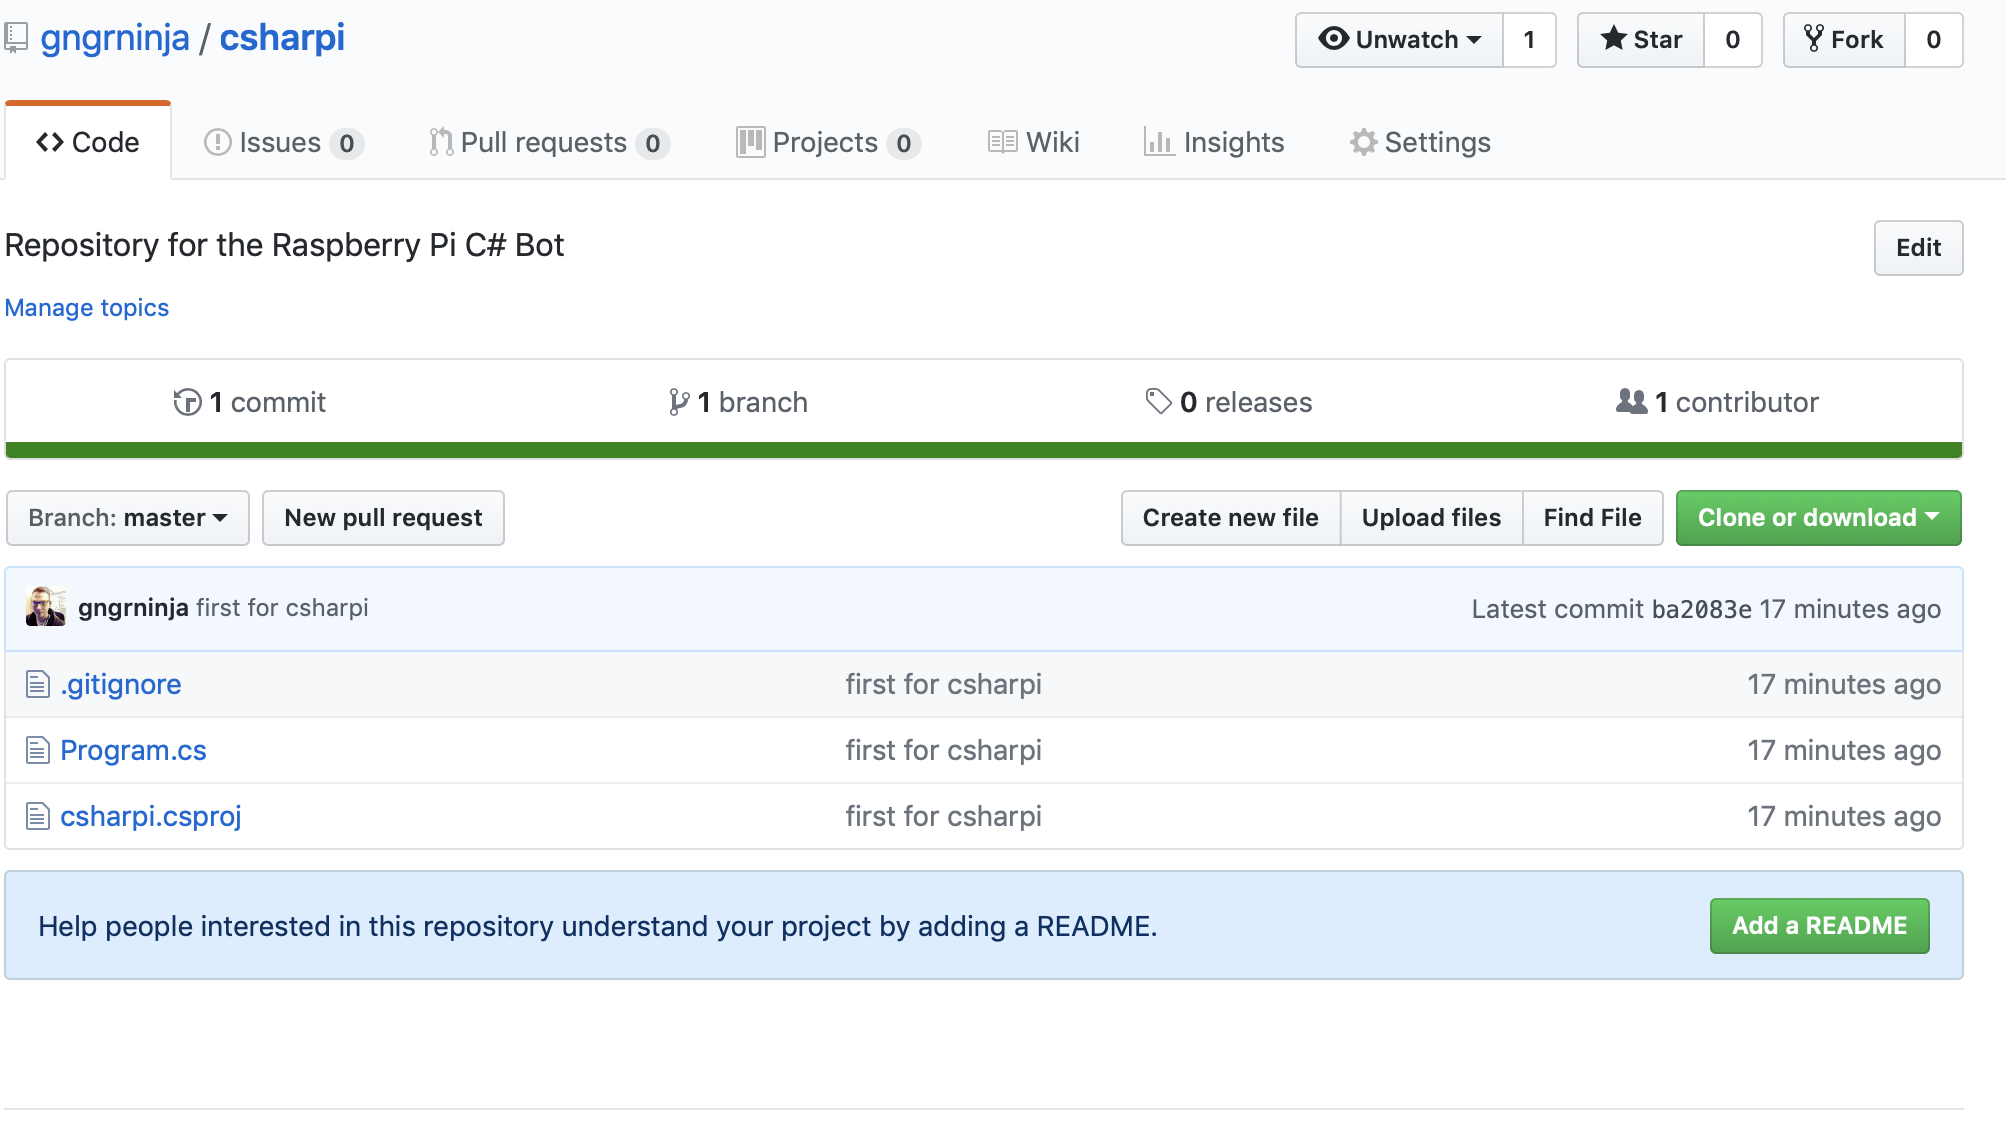
Git Repository Initialization
Now we will initialize the local instance of the Git repository, and push up our code to Github. If you don’t have an account on Github, you can create one, here: https://github.com/join?source=header-home. Once you create it, log in and hang on because we will be using it shortly.
Local Initialization
1. Open up your favorite terminal / console and navigate to the csharpi folder we created. Once there, run: git init. Keep the window open.

2. Open up the csharpi folder in Visual Studio Code. You’ll notice the Git icon (branching line) has an indicator that there are 22 files to work with. Let’s fix that by creating a file named .gitignore, and tell Git what files we don’t want to commit.
3. Click the File icon in VS Code to see the files in the project, and then click the create new file icon. Name the file .gitignore

4. Open the .gitignore file by clicking it, and add the following contents:
        /bin
        /obj
        *.json
This will tell Git to ignore the /bin and /obj folders, as well as any file ending in .json. Since we will be creating a json configuration file with a token we do not want to share in it later, this is a good thing.

5. Switch back to the terminal / console window you have open and run:
        git add .
        git commit -m 'first for csharpi'
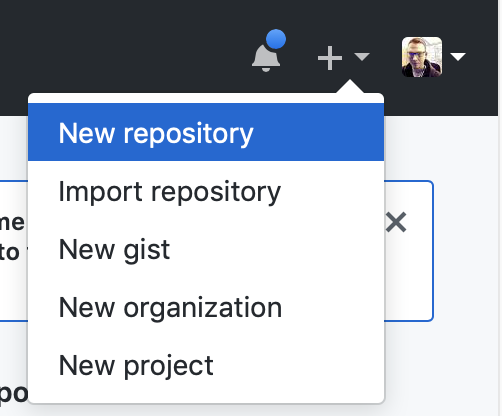
6. Now go to Github and login.
7. Once logged in, click the [+] icon in the upper right, and select “New repository”.
8. On the next page, give it a name and description. Keep it public to follow along with this tutorial. Cloning it will be much easier on the Pi that way.

9. Click “Create repository”, and check out the instructions on the next screen. You’ll see that we completed most of it already.
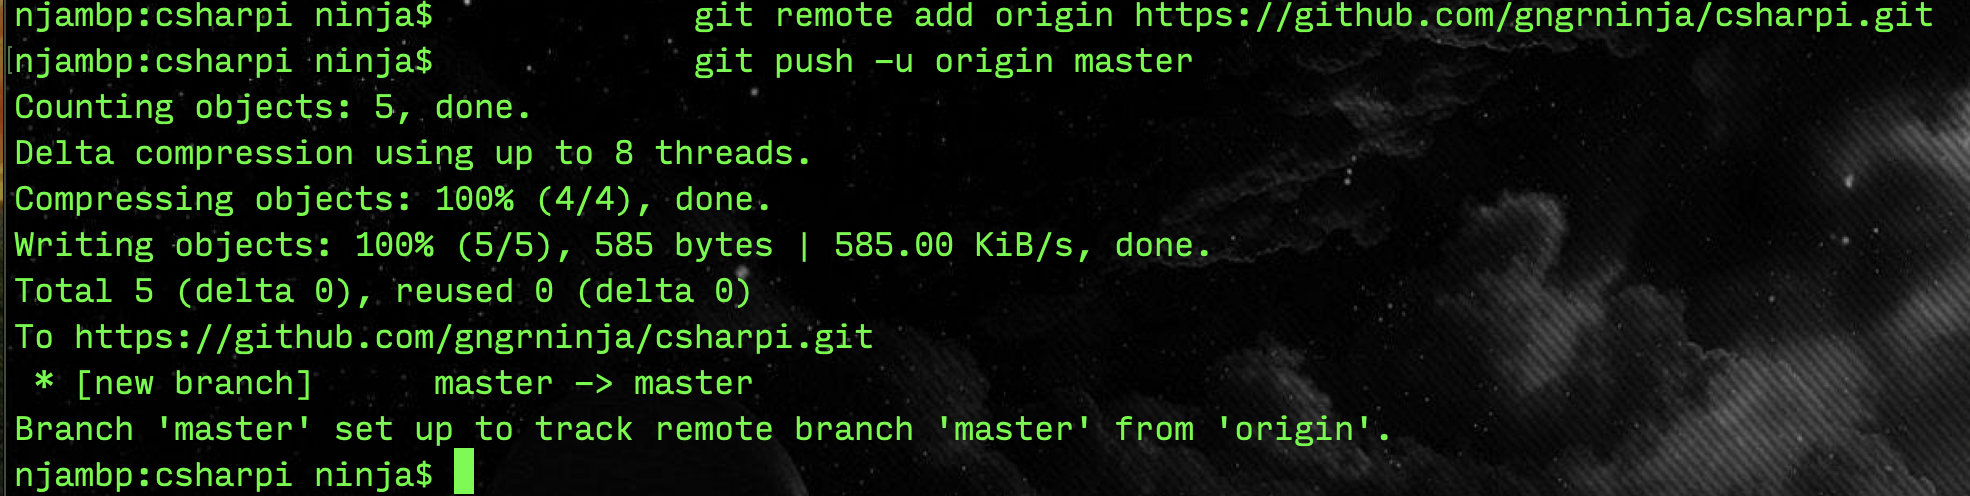
10. Run the two commands for existing repository.
For me it is (your commands will look similar, with the url after origin reflecting your username and repo name):
            git remote add origin https://github.com/gngrninja/csharpi.git
            git push -u origin master
11. You should now see the following on the command line, and on Github once you refresh the page:
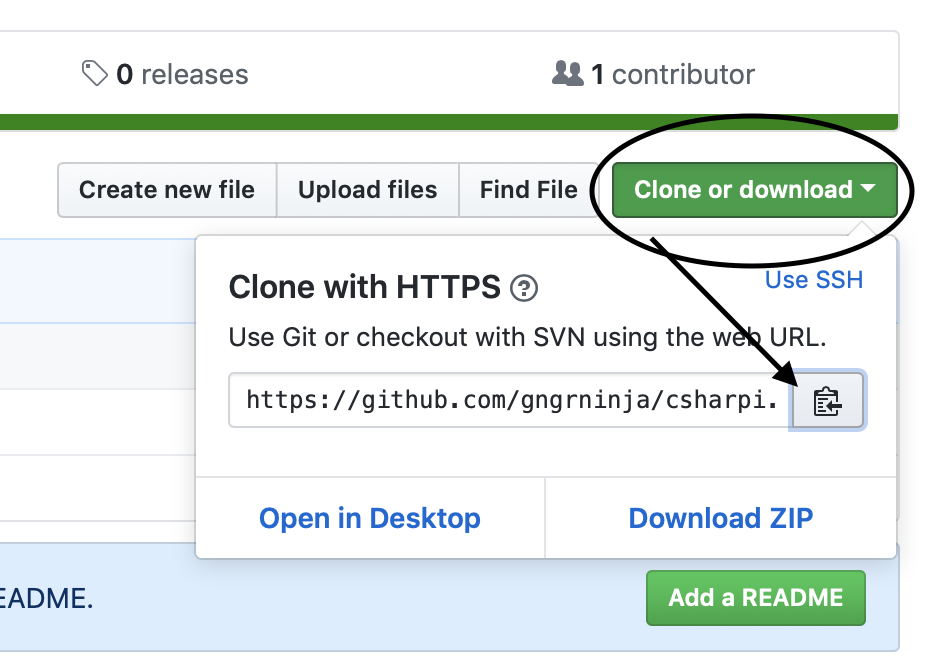
Cloning the Repository to the Pi
Now let’s test that .NET is working correctly on the Pi.
1. Go to your Github repository for this project (for me it is https://github.com/gngrninja/csharpi), and click “Clone or download”, and then copy the URL.
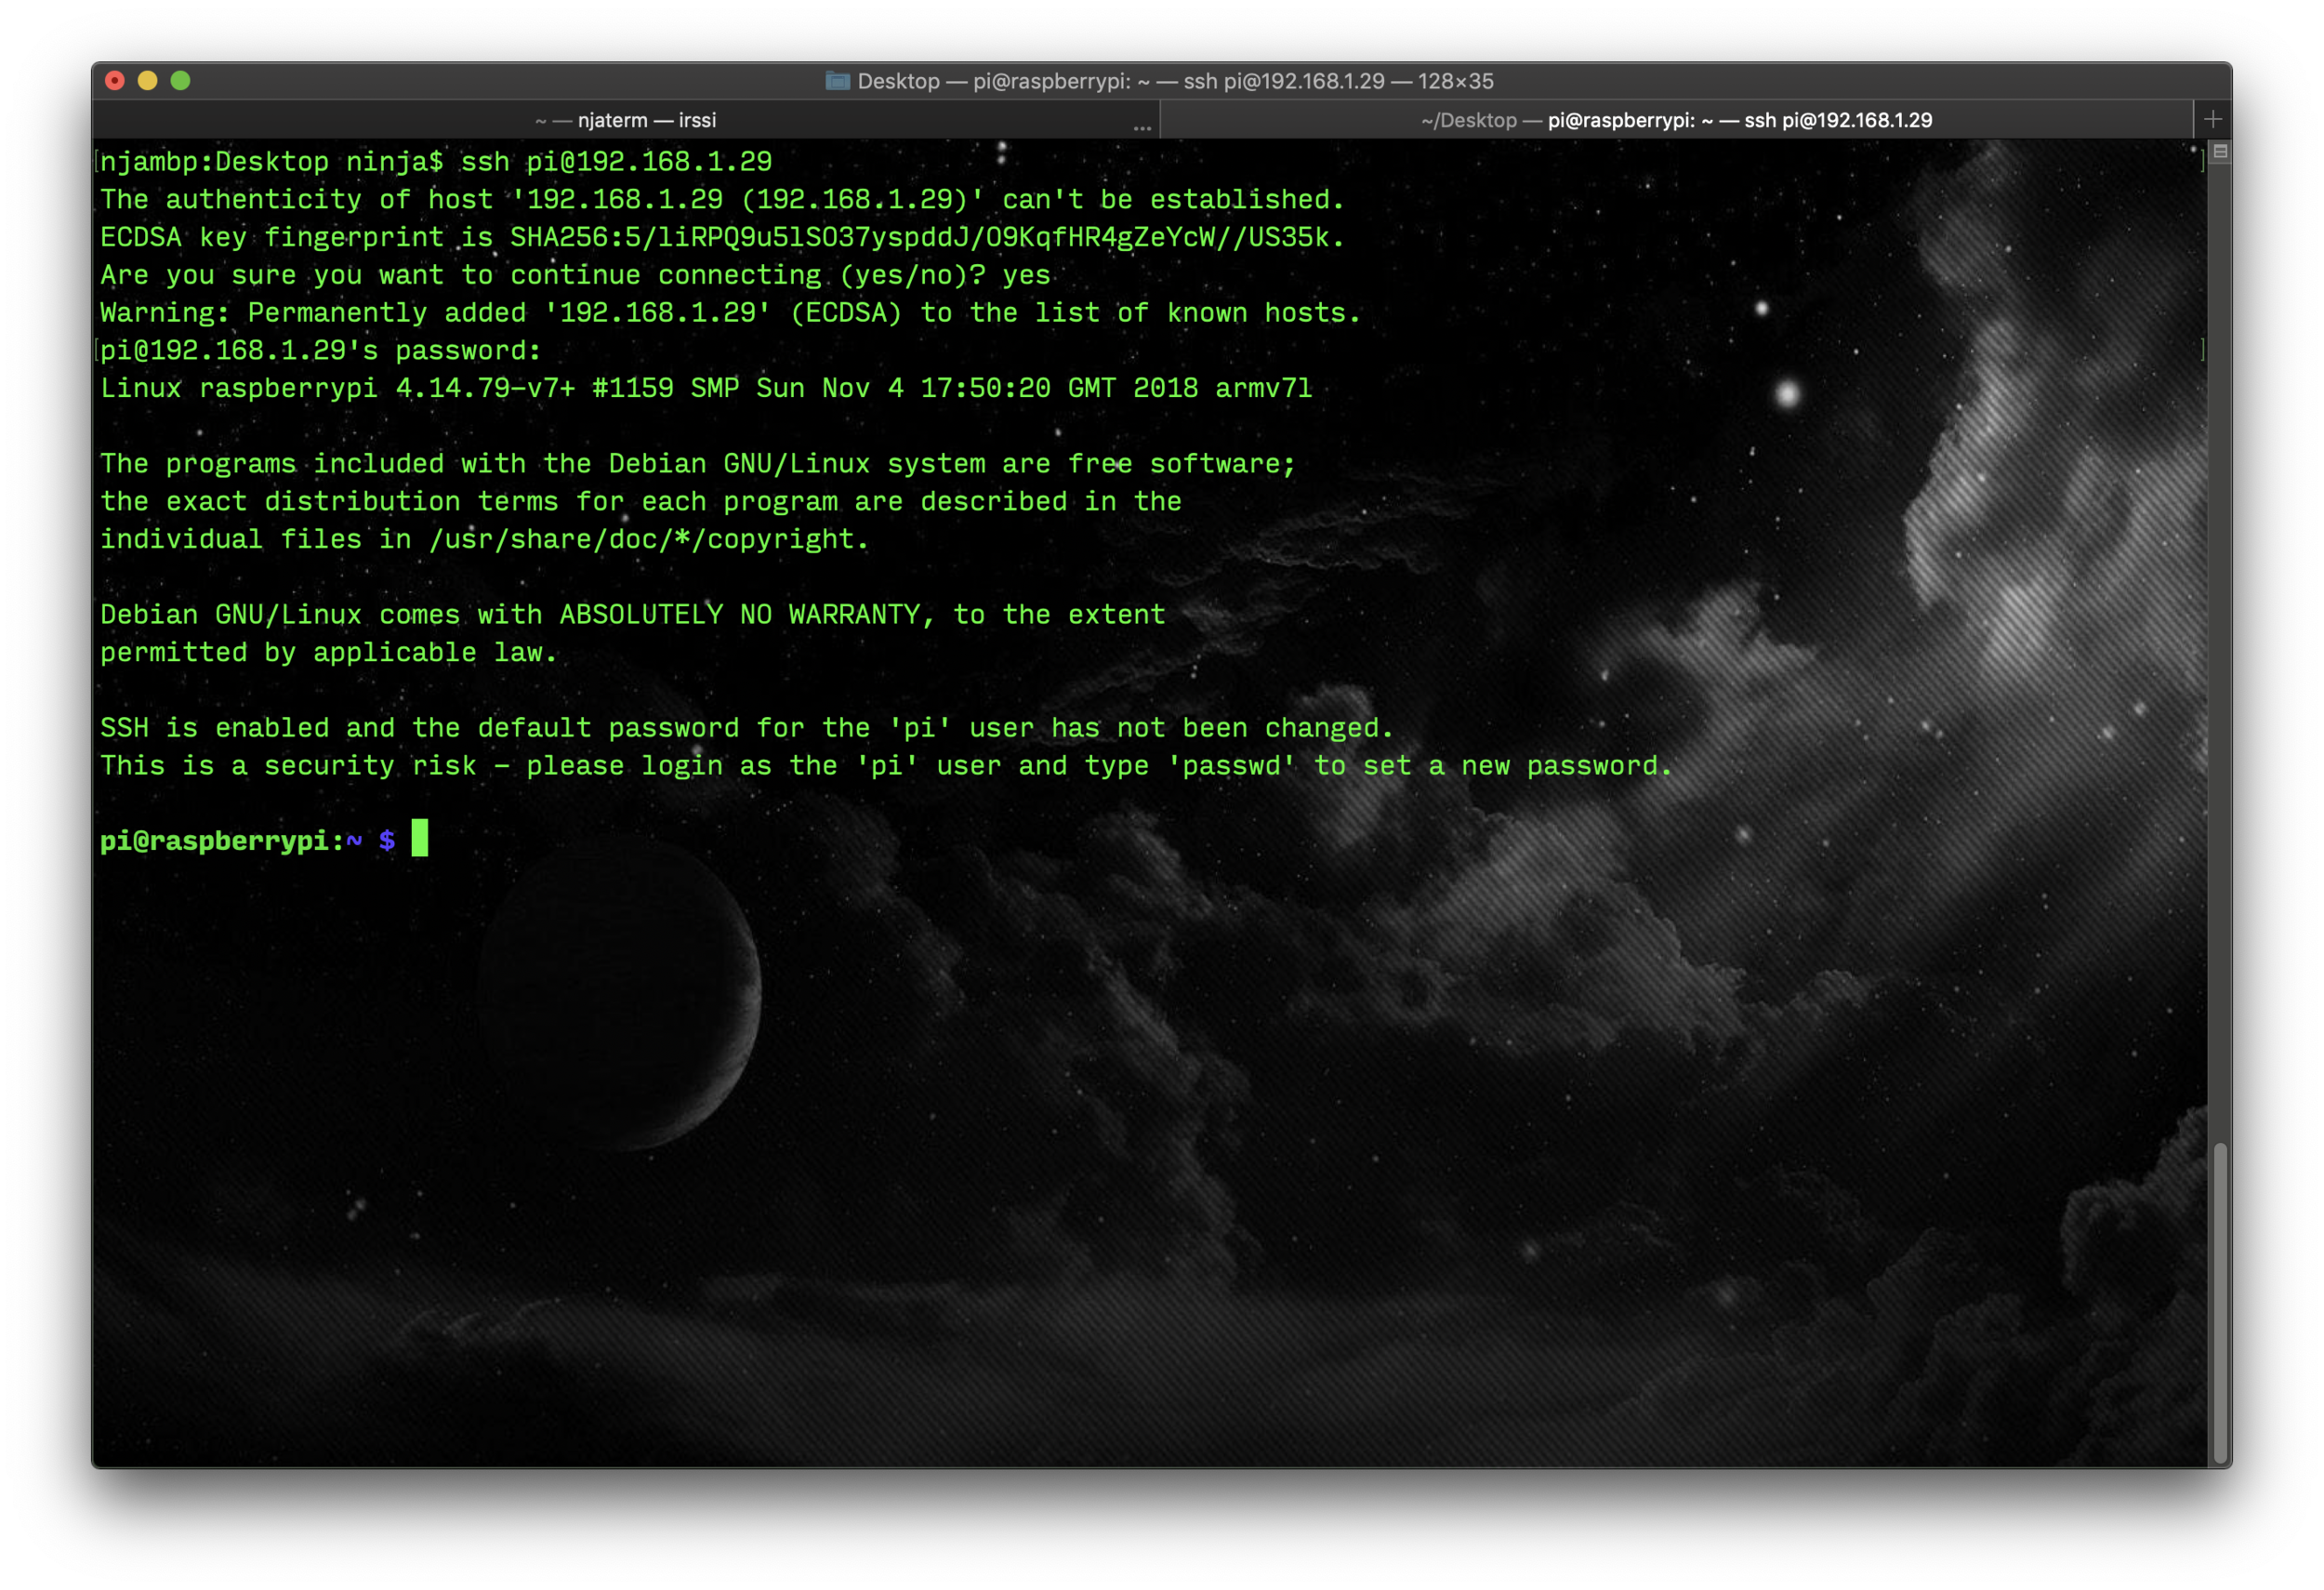
2. SSH into your Raspberry Pi and run git clone, and then paste in the URL we copied from the above step.:
git clone https://github.com/gngrninja/csharpi.git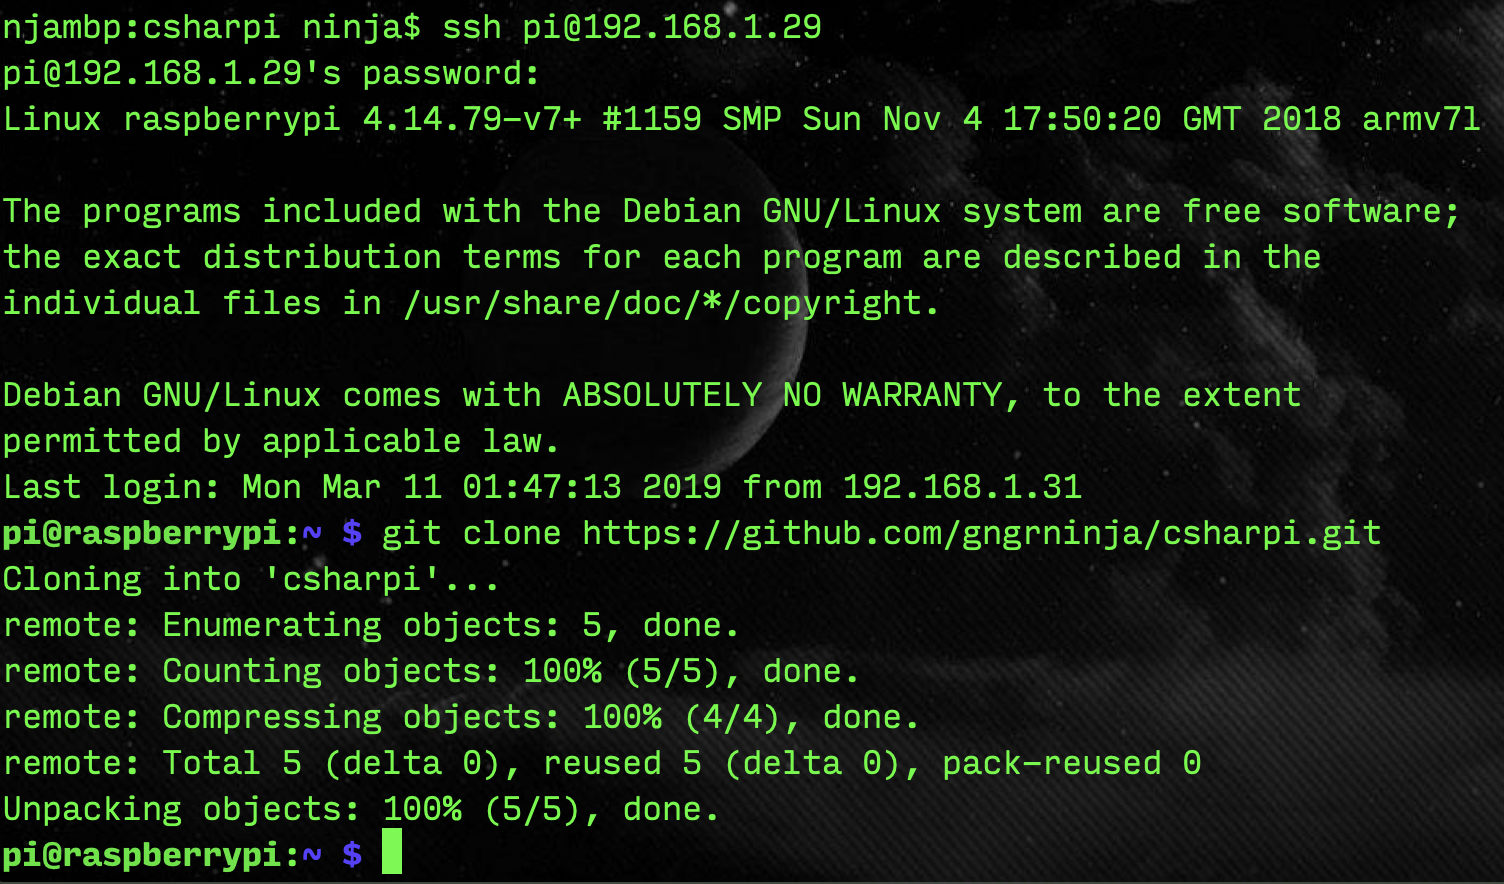
3. We can now change directory to csharpi, check out the contents, and try running it (essentially in debug mode):
        cd csharpi
        ls
        dotnet run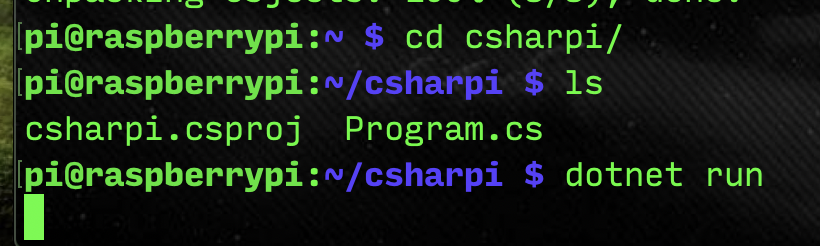
4. Debugging on the Pi with .NET is not fun. It takes forever, and is on their list to fix (as much as they can, considering it is not the fastest processor). Eventually, however, you should see the following:

5. Fret not, running the compiled/published application is much faster. To see this happen let’s create a folder under our home folder that will contain the published version of our code.
mkdir /home/pi/bot6. The /home/pi/csharpi folder will contain the code we clone from the repo, that we work on from our main machine via VS Code. The /home/pi/bot folder will contain the published version of that code, that executes much faster. Let’s ensure we are in the source code folder, and run the command to publish the app:
        cd /home/pi/csharpi
dotnet publish -o /home/pi/bot 
7. Now that it is published, we can run the application. It will execute much faster as the published version.
        cd /home/pi/bot
        dotnet csharpi.dll
(I know right, running a dll on *nix?!)

Success! We now have the groundwork laid for creating the Discord bot.
Now let’s get a Discord bot going: